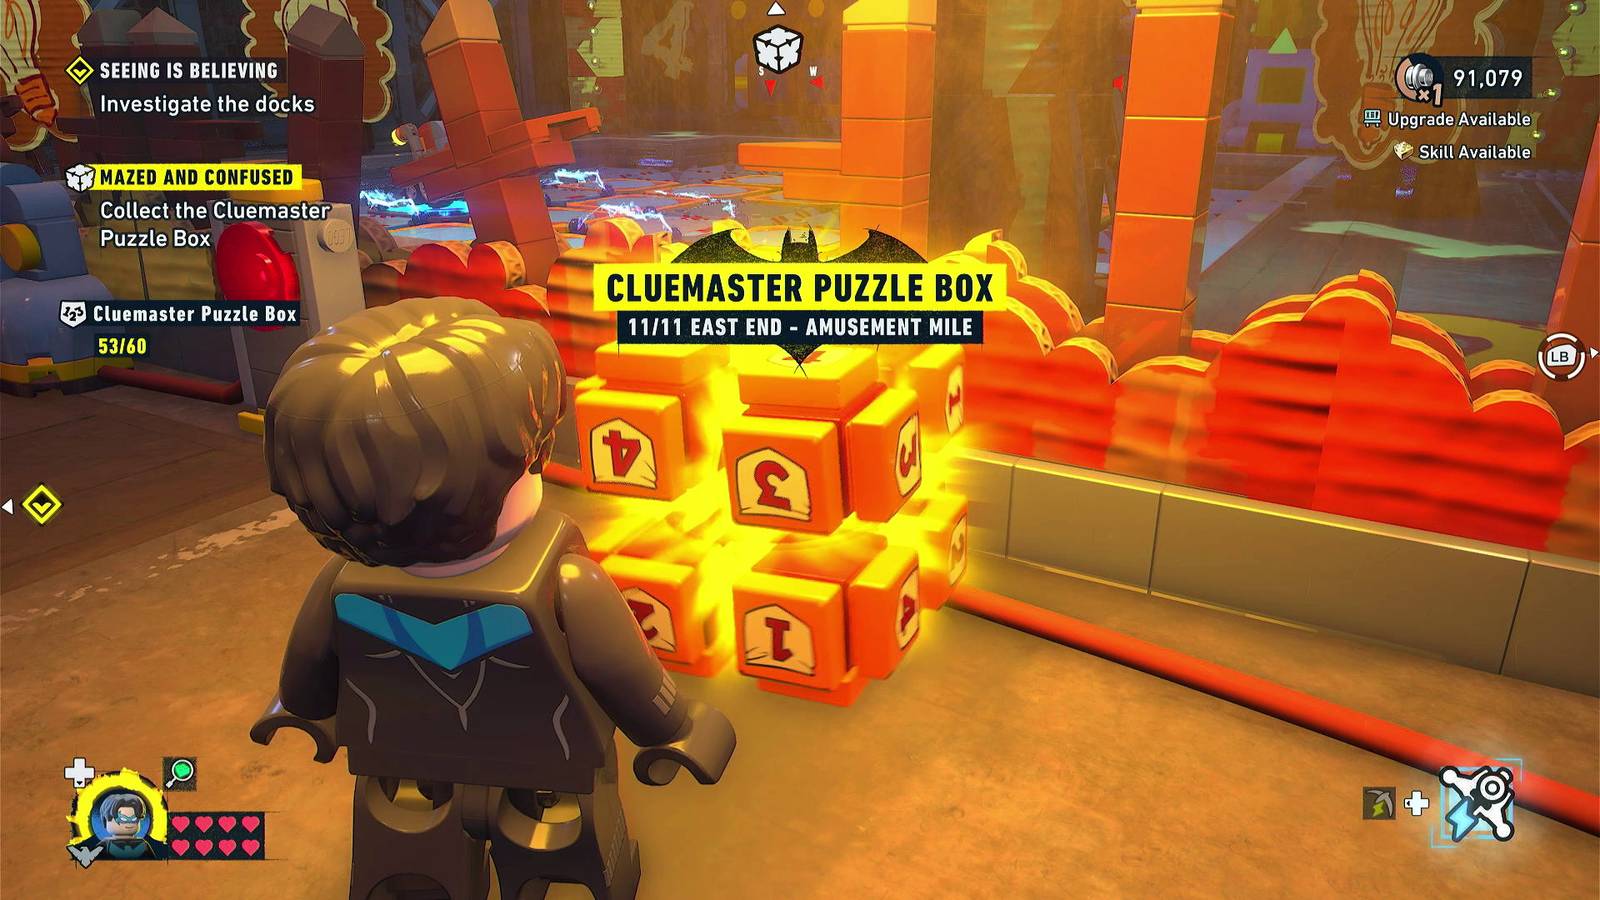
Looking to solve every Cluemaster Puzzle in East End in LEGO Batman: Legacy of the Dark Knight? East End, which appears on the in-game map as East End – Amusement Mile, has 11 Cluemaster Puzzles to find and solve, and some of them require specific characters or abilities before they can be completed.
This guide primarily focuses on puzzle solutions, since Cluemaster Puzzle icons can be revealed on the map after activating the district tower. Below, you’ll find every Cluemaster Puzzle in East End – Amusement Mile in LEGO Batman: Legacy of the Dark Knight, its coordinates, details on any required character or ability, and how to solve it.
For more collectibles and 100% completion help, see our LEGO Batman: Legacy of the Dark Knight Collectibles Guide & Locations. For broader help with missions, characters, unlocks, and Gotham exploration, visit our guide directory.
LEGO Batman Legacy of the Dark Knight All Towers & How To Access Them?
If you have been wondering how to access the Towers scattered across Gotham, here’s when they unlock and what they actually do.
All East End Amusement Mile Cluemaster Puzzles Overview

There are 11 Cluemaster Puzzles in East End – Amusement Mile. Several can be solved with any character, while others require Robin, Jim Gordon, Nightwing, or Batgirl. The district also has one Puzzle Room that doesn’t unlock until you have completed several previous Cluemaster Puzzle Rooms. You can see in-game coordinates by opening the map, moving the cursor around, and looking in the bottom-right corner of the screen.
|
Puzzle |
Coordinates |
Required Character |
|---|---|---|
|
Mysterious Puzzle |
452, 820 |
Robin |
|
Timed Challenge |
294, 883 |
Jim Gordon |
|
Golden Gliding |
343, 869 |
Any character |
|
Commission Impossible |
342, 837 |
Any character |
|
Cryptex Chaos |
403, 860 |
Jim Gordon |
|
Wire Transfer |
408, 859 |
Nightwing, Batgirl |
|
The Path of Least Resistance |
399, 841 |
Any character |
|
Hang Out |
420, 822 |
Any character |
|
Spoiler Sport |
444, 876 |
Nightwing |
|
Clued In |
357, 883 |
Batgirl |
|
Mazed and Confused |
Puzzle Room at 420, 900 |
Nightwing, Batman |
What You Need Before Solving Every East End Cluemaster Puzzle
While you’ll definitely have access to Jim Gordon and Robin by the time you start working on East End – Amusement Mile Cluemaster Puzzles, you may need to come back to them after unlocking Nightwing and Batgirl. For unlock timing, see our How to Unlock All Playable Characters guide.
Also, the Mazed and Confused Puzzle Room doesn’t unlock until you complete the Cluemaster Puzzle Rooms in Newtown, Old Gotham North, Old Gotham South, The Cauldron South, and The Cauldron North. If you can’t see the East End Puzzle Room on the map, keep working through Cluemaster Puzzles and Puzzle Rooms across Gotham and return to this district when it appears.
All East End Amusement Mile Cluemaster Puzzle Solutions
Mysterious Puzzle Cluemaster Puzzle Solution

The goal of this Cluemaster Puzzle is to rotate the three symbols above the red button so that they match the three symbols on the wall to the left.
Start by looking across from the puzzle to find a suspended container. Hit the cable holding the container with a projectile, then pick up the lever that drops. Insert the lever into the nearby gear and rotate it until the middle symbol shows leaves.
Next, face the puzzle and look to your right to find a dumpster with a yellow connector. Use Robin’s Cable Launcher to connect that yellow connector to the yellow point on the elevated beam to your left. This will move the dumpster and reveal a device on the wall. Insert Robin’s staff into it and slide until the top symbol shows a globe.
Finally, insert Robin’s staff into the device below the symbols on the wall and slide it until the bottom symbol shows pi. Once all three symbols match, press the red button to solve the puzzle.
Timed Challenge Cluemaster Puzzle Solution
- Coordinates: 294, 883
- Required Character: Jim Gordon
Follow the three wires from the large clock to find three smaller ticking clocks. Break the cover below each ticking clock to access their gears, then use Jim Gordon’s foam sprayer on the gears to stop the clocks in the following positions:
- Clock above the large clock: Pointing at 3
- Clock to the right of the large clock: Pointing between 8 and 1
- Clock to the left of the large clock: Pointing between 6 and 7
Once all three clocks are stopped in the correct positions, the cube will unlock.
Golden Gliding Cluemaster Puzzle Solution
- Coordinates: 343, 869
- Required Character: Any character
Go southwest of the cube to find a platform on the ground that can be activated with a vehicle. Drive onto the platform to create an air current above it.
Use the air current to get a boost, then glide between the blue horizontal pieces leading to the cube. Passing through all those pieces deactivates the electricity under the cube, allowing you to collect it.
Commission Impossible Cluemaster Puzzle Solution
- Coordinates: 342, 837
- Required Character: Any character
Start by breaking the phone booth leaning against the car stopped in front of the tumblers to reveal its hitch. Use a vehicle to connect a tow-line to the hitch, then pull the car out of the way.
After moving the car, build the two buttons in its place. Now press the buttons to stop the tumblers at 3112. As with other Cluemaster tumbler puzzles, these tumblers show numbers next to mirrored versions of themselves, making things a little confusing initially.
The code for this puzzle is revealed by looking at the poster behind the cube and the poster past the fire in front of the cube.
Cryptex Chaos Cluemaster Puzzle Solution
- Coordinates: 403, 860
- Required Character: Jim Gordon
Use Jim Gordon’s foam sprayer on the pipe to stop the water and reveal the full code for the tumbler puzzle. One half of the code is on the poster on the wall, and the other half is on the ground that was electrified by the water.
The correct code is 2432, and you should press the red buttons to stop the tumblers on those digits. Once again, the tumblers show numbers next to mirrored versions of themselves.
Wire Transfer Cluemaster Puzzle Solution
- Coordinates: 408, 859
- Required Characters: Nightwing, Batgirl
Follow the wire connected to the cage with the cube all the way around the building to find an electrical device. Use Nightwing’s staff to charge it.
Once the device is active, follow the blue power as it flows through the wires. Hit the targets with a projectile to redirect the power along the correct path. When it finally reaches the end, use Batgirl’s Hackarang to hack the node to the right of the cube and open the cage.
The Path of Least Resistance Cluemaster Puzzle Solution
- Coordinates: 399, 841
- Required Character: Any character
Go to the top of the building west of the puzzle to find three spotlights, and pull the nearby switch to power the buttons in the puzzle area.
Now point the lights down at the buttons, using the change lens input on each of the spotlights to create a light path across the buttons. Walk along the light path, starting in the bottom-left corner, to activate the buttons in the correct order and solve the puzzle.
Hang Out Cluemaster Puzzle Solution
- Coordinates: 420, 822
- Required Character: Any character
Break the objects by the door of the building with the long horizontal sign to reveal a battery. Insert the battery into the terminal on the device with the arm and chain.
Next, break the box just northwest of that device to reveal a gear. Insert the gear into the device with the chain, then flip the switch to raise the cage with the cube.
Spoiler Sport Cluemaster Puzzle Solution
- Coordinates: 444, 876
- Required Character: Nightwing
Follow the wire connected to the cage with the cube all the way to the power source at the end. Head right to find three large silver boxes on the wall.
Use Batman’s X-ray vision to see through the boxes and reveal the nodes that must be connected with Nightwing’s Electric Cable Launcher to send power to the cube. Stand on the red button to open a silver box, make the correct connection, and repeat this process for all three metal boxes.
Here are the connections you should make:
- Left box: Connect top-middle to top-right.
- Middle box: Connect bottom-left to top-right.
- Right box: Connect top-left to top-middle, then connect bottom-middle to bottom-right.
Clued In Cluemaster Puzzle Solution

- Coordinates: 357, 883
- Required Character: Batgirl
Follow the wire from the gate blocking the cube to reach a silver panel. Use Batman’s Batclaw to remove the silver panel, then use Batgirl’s Hackarang on the device that is revealed. Complete the hacking minigame to open the gate and collect the cube.
Mazed and Confused Cluemaster Puzzle Room Solution

- Coordinates: Puzzle Room at 420, 900
- Required Characters: Nightwing, Batman
As noted, you’ll need to complete the previous five Cluemaster Puzzle Rooms before you can enter this one. If you don’t see Mazed and Confused on the map, go work on some more Cluemaster Puzzles and Puzzle Rooms and return when it’s available.
When you unlock the Puzzle Room, use Nightwing to charge the device near the front door. Now head inside and follow these steps to solve the puzzle:
Room 1 Solution
Use the vent in the floor in the corner and follow the path to the end. Use Nightwing’s staff to slide the device that lowers the forklift’s forks, and grab the east tile.
Pry open the door to enter the next room, where you’ll find a north tile and an east tile on the ground. Have one character turn the wheel on the wall to raise the dock door. Then have the other character push the nearby crates under the door to prop it open.
Before you leave this room, use Batman’s Batclaw on the silver panel on the wall to get another south tile. You now have every tile required for the first robot path puzzle, and you should insert the tiles in this order before pressing the red button: East, east, north, east, north, north.
Room 2 Solution
Use the key that you receive from completing the first puzzle to enter the second room. You’ll find some tiles on the ground here, but you’ll need to collect a few more before you can solve the second puzzle.
Start by using Batman’s Batclaw on the silver panel on the wall to access a small room. Inside, use Nightwing to charge the device and start a conveyor belt in the larger room, which gives you a west tile.
Next, use Nightwing’s Electric Cable Launcher to create a tightrope between the nodes above two hooks. This is on the side of the room with the conveyor belt. Now grapple onto a hook, climb onto the tightrope, and use it to reach a raised platform with another west tile.
Finally, use the tightrope on the side of the room where you removed the silver panel to jump and glide to another raised platform with a final west tile. You now have every tile required for the second robot path puzzle, and you should insert them in this order: South, west, south, west, west, north, west.
Do Towers Reveal East End Cluemaster Puzzles?
Yes, activating the East End tower will reveal collectible and activity icons in the district, including Cluemaster Puzzles. However, finding a puzzle is just the beginning, as you must then solve it.
For more on map-reveal towers, see our All Towers & How to Access Them guide.
Do East End Cluemaster Puzzles Count Toward 100% Completion?
Yes, you need to solve all 11 East End – Amusement Mile Cluemaster Puzzles to earn the A Watchful Collector achievement and reach 100% completion.
More LEGO Batman Legacy of the Dark Knight Collectible Guides
Looking for more Gotham collectibles and puzzle solutions? Start with these guides:

- Released
-
May 22, 2026
- Franchise
-
LEGO Batman
- PC Release Date
-
May 22, 2026
