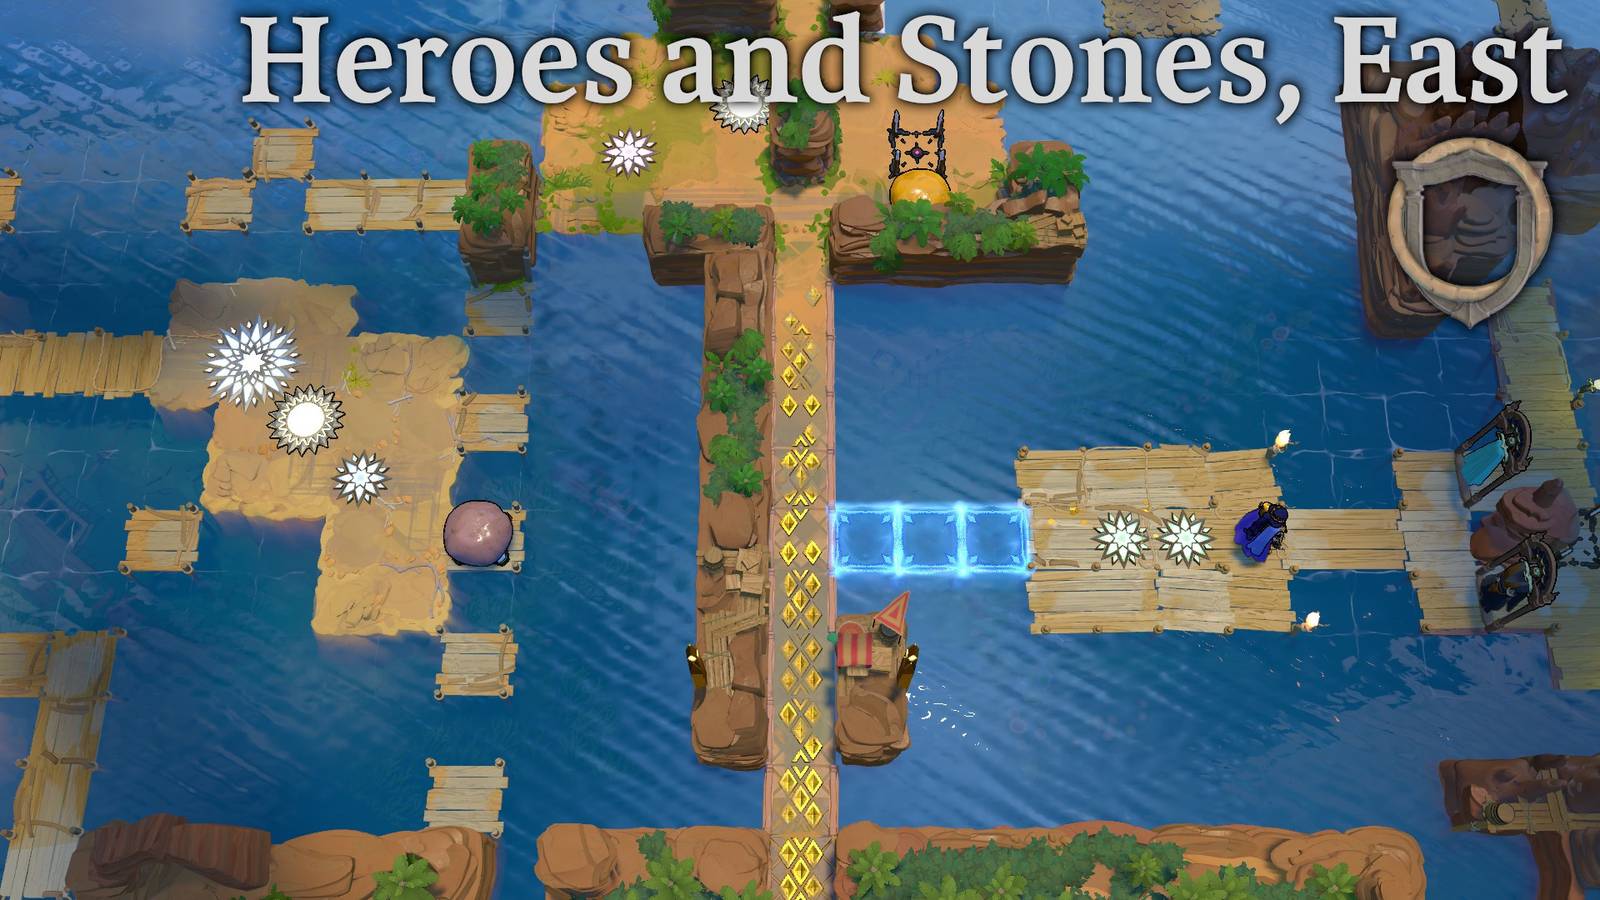
Heroes and Stones East is a far south area in Order of the Sinking Star. It is accessed by opening the HxS gold room, which can be reached after making significant progress in Heroes of Hauling and Skipping Stones, and completing screen #3 in Heroes and Stones West. This walkthrough will help you reach Order of the Sinking Star‘s Heroes and Stones East area and solve all the puzzles found there.
Instructions that give an unmodified direction (e.g. “move left”) mean move one square in that direction. If the direction has a modifier (e.g. “x3”), move that many squares in the indicated direction. If the term “all the way” is used, travel in that direction until you run into a barrier or reach the end of a path.
How to Reach Heroes and Stones East
Reach and Complete Heroes and Stones West Screen #3
To access Heroes and Stones East, you must open the HxS gold room, enter Heroes and Stones West, and work through its puzzles until you have completed the third screen. Check our All Heroes and Stones West Puzzle Solutions guide if you need any help with that process.
Put a Stone on the Blue Button
Completing the first puzzle on Heroes and Stones West screen #3 removes a barrier that blocks a blue button. You must now put a stone on that button, and here is how that is done:
- Return to Heroes and Stones West screen #1.
- Use the reset tile to reset the stone.
- Push the stone left, then up through the water.
- Go to Heroes and Stones West screen #2.
- Push the stone all the way right, down, all the way right.
- Go to Heroes and Stones West screen #3, and use the warp.
- Travel to the warp on Heroes and Stones West screen #1.
- Go up to screen #2. You are now below the stone, and you should push it up across the water.
- Push the stone right x3, down x2, right x2, down, right to put it on the button.
Cross the Blue Barriers
Putting the stone on the button activates a row of blue barriers on the screen above the HxS gold room. Use the nearby warp to quickly reach the warp by the barriers, and use those barriers to head right into Heroes and Stones East.
Heroes and Stones East Screen #1

Puzzle #1 Solution
- Use the thief to pull the left stone all the way down. Then move her to the dock’s left outlet.
- Use the sailor to push the stone down, left. Then push it left into the lily pad.
- When the lily pad/stone passes above the thief, use her to pull the stone all the way down.
- Use the thief to pull the remaining crystal in the top-right corner all the way down. Then return her to the dock’s left outlet.
- Use the sailor to push the stone down, left x2. Then push it left across the water.
- Use the thief to pull the stone down out of the water as it passes above her.
- Use the sailor to push one of the stones onto a teleporter. Then push the other stone into that stone, submerging it and creating a path to the teleporters.
Puzzle #2 Solution
- Use the thief to pull the stone right, down. Then move her right.
- Use the sailor to push the stone right, down. Then move her all the way right, down, right, down.
- Use the thief to pull the stone above the sailor. Then use the sailor to push the stone up across the gap.
- Move the thief right, down, right x3, all the way up.
- Use the sailor to push the stone right across the water. Use the thief to pull the stone down as it passes above her. Then pull it down again.
- Use the sailor to push the stone all the way down, right. Then push it right across the gap. Move her above the stone.
- Move the thief to the bottom-right square of the middle dock. Use the sailor to push the stone down through the water. Use the thief to pull it left as it passes her.
- Move the thief to the bottom-right dock, and move the sailor to the left of the stone.
- Use the sailor to push the stone right through the water. Use the thief to pull it up as it passes her.
- Move the sailor to the right of the stone. Move the thief right, up x2, all the way left, down, left, down.
- Use the sailor to push the stone left through the water. Use the thief to pull it up as it passes her.
- Move the sailor to the left of the stone. Move the thief to the square up, right from the stone.
- Use the sailor to push the stone right into the water. Immediately use the thief to pull it up.
- Use the sailor and thief to put the stone on the button and deactivate the barriers.
Solving this puzzle deactivates a barrier, allowing you to move right to the next screen.
Heroes and Stones East Screen #2

To reach the first puzzle, enter the screen through the druid robe and transform the first plant. Then transform the second plant. Now re-enter the screen through the sailor robe and push the transformed plant right into the water.
Top-Left Puzzle Solution
- Move the druid up, all the way right.
- Use the sailor to push the stone all the way right. Then push the stone up across the water.
- Use the druid to transform the stone as it passes him. Then transform it again to create a path to the second landmass.
- Move the druid right x5, down.
- Use the sailor to push the bottom stone right x2. Then push the stone up across the water.
- Use the druid to transform the stone as it passes him. Then transform it again. Stand on the submerged stone.
- Use the sailor to push the remaining stone down, all the way right. Then push the stone up across the water.
- Use the druid to transform the stone as it passes him. Then transform it again to create a path to the third landmass.
- Move the druid right x4, up, right x2, down.
- Use the sailor to push the bottom stone all the way right. Then push the stone up across the water.
- Use the druid to transform the stone as it passes him. Then transform it again. Stand on the submerged stone.
- Use the sailor to push the remaining stone down, all the way right. Then push the stone up across the water. The druid will block and sink the stone, creating a path to the teleporters.
Now re-enter the screen through the druid robe and transform the plant in the top-right corner to access the top-right puzzles.
Top-Right Puzzle #1 Solution
- Use the sailor to push the stone left x2. Then push it up across the water, sending the lily pad to the right.
- Quickly move the sailor to the lily pad. Then use the druid to transform her into a stone.
- Move the druid to the right, keeping the lily pad/stone on top of him. This will prevent the monster from hitting him as he moves to the teleporters.
- After the lily pad passes the monster, use the druid to transform the crystal back into the sailor.
Top-Right Puzzle #2 Solution
- Move the druid to the bottom-right corner of the landmass.
- Use the sailor to push the stone down. Then board the top lily pad as it passes her.
- Use the druid to transform the stone as it passes him, stopping the second lily pad.
- Move the sailor right onto the dock as she passes it. Then use the druid to transform the plant back into a stone.
- Use the sailor to push the crystal onto the right blue button.
- As the lily pad/stone passes the dock, use the sailor to push all the way left. Then push the stone onto the front lily pad.
- Quickly use the druid to transform the stone, stopping the front lily pad.
- Move the sailor to the back lily pad. Then use the druid to transform the plant back into a stone.
- Use the sailor to push the stone left across the water. It will land on the left button, removing the barriers.
How to Reach the Bottom-Right Puzzle
Solving the previous puzzles unlocks a skipping stone and activates the bottom-right puzzle. Here’s how to reach it:
- Use the reset tile on the left to reset the screen.
- Use the druid robe to transform the first two plants.
- Use the sailor robe to push the unsubmerged crystal down x2, right.
- Use the druid robe to transform the top-right plant.
- Use the sailor robe to push the skipping stone right, up x3, left across the water, down x2, left x3, left across the water, down x2, right x2, right across the water. The remaining plant will sink the stone.
- Use the druid robe to transform the remaining plant, creating a path to the puzzle.
Bottom-Right Puzzle Solution
- Move the druid onto the right lily pad.
- Use the sailor to push the top stone into the row below the druid. Then push it left across the water to send the lily pad/druid into the current.
- As soon as the druid enters the current, push the remaining stone up into the left lily pad. The goal is for the two lily pads to be in the current next to each other.
- When the druid reaches the first outlet in the middle landmass, transform the stone. Then disembark and transform the bottom-right monster.
- Re-board the lily pad, and transform the plant back into a stone.
- When the druid reaches the second outlet, transform the stone. Then disembark and transform the bottom-left monster.
- Re-board the lily pad, and transform the plant back into a stone.
- When the stone is below the top monster, transform it.
- Use the sailor to push the stone on the bottom landmass right across the water. Then push it down, right, up x7. Then push it left across the water. It is now on the platform with the top monster, blocking it.
- Move the sailor to the bottom teleporter.
- Use the druid to transform the plant back into a stone, allowing him to ride to the top teleporter.
Now head right to the next screen.
Heroes and Stones East Screen #3

Enter the screen through the sailor robe. Push the stone up x2, right x2. Then push it right across the water. It will hit the upward-facing monster and sink.
Now re-enter through the cleric robe. Move to the bottom-right corner of the landmass, move right into the downward-facing monster’s fire, move up x7, right x2, up to reach the landmass with the top-right puzzle series.
Top-Right Puzzle #1 Solution
- Move the cleric up x2.
- Use the sailor to push the bottom stone up. Then push it right across the water. The cleric will sink it.
- Move the cleric left, up x2 to reach the middle landmass.
- Move the cleric into the downward-facing monster’s fire. Move her up until there is one space between her and the monster.
- Use the sailor to push the remaining stone up. Then push it up across the gap. Push the stone right across the water. The cleric will sink it.
- Move the cleric left x2, up x3, right to reach the top landmass.
Top-Right Puzzle #2 Solution
- Use the sailor to push the monster down x2.
- Move the cleric down into the row with the lily pad.
- Use the sailor to push the monster down x2.
- Move the cleric left onto the lily pad.
- Use the sailor to push the monster up. Then push one of the stones into the row with the cleric. Push the stone right across the water into the cleric, causing it to sink.
- Move the cleric right. Then use the sailor to push the monster onto the lily pad.
- Move the cleric right onto the bottom landmass.
- Use the sailor to push the remaining stone into the row below the monster. Then push it right across the water, sending the monster/lily pad up.
- Move the cleric up across the landmasses as the monster moves up, using its fire to cross the gaps.
Top-Right Puzzle #3 Solution
- Use the sailor to push the monster down.
- Move the cleric left x4, up x2. Move the warrior below the cleric.
- Use the sailor to push the monster up x3. Use the warrior to push the cleric up into its fire.
- Use the sailor to push the monster down. Then push one of the stones into the row with the cleric, and push it right across the water to sink it.
- Use the sailor to push the monster up.
- Move the warrior and cleric left. Then use the warrior to push the cleric up.
- Use the sailor to push the monster up.
- Control the warrior and push up x2 to move him and the cleric to the teleporter landmass.
- Move the cleric to the top-right corner of the landmass. Move the warrior below him.
- Use the sailor to push the monster into the row with the cleric.
- Use the sailor to push the remaining stone into the row above the cleric. Then push it right across the water.
- When the stone is above the cleric, use the warrior to push up. This will send the lily pad to the left, creating a path to the sailor’s teleporter.
- Use the sailor to move the monster up, allowing the cleric and warrior to move to their teleporters.
Top-Right Puzzle #4 Solution
- Move the cleric below the monster. Use the warrior to push the cleric-monster column up x2.
- Move the cleric to the left of the monster. Use the warrior to push the cleric-monster row right.
- Move the cleric above the monster. Use the sailor to push a stone into the cleric’s row, then push it right across the water. It will sink to the left of the cleric.
- Move the cleric to the right of the monster. Use the warrior to push the cleric-monster row left x2.
- Move the cleric above the monster. Use the sailor to push a stone into the cleric’s row, then push it right across the water. It will sink to the left of the cleric.
- Move the cleric to the right of the monster. Use the warrior to push the cleric-monster row left.
- Move the cleric below the monster. Use the warrior to push the cleric-monster column up. The monster is now on the left submerged stone.
- Move the cleric and warrior left. Use the warrior to push up x3. The cleric and warrior can now access the teleporters.
How to Reach the Bottom-Left Puzzle
Solving the previous puzzle series unlocks another skipping stone. Use it to reach the bottom-left puzzle:
- Backtrack to the left landmass and press the reset tile.
- Use the sailor robe to push the bottom stone right across the water.
- Push the remaining stone into the row with the previous stone. Push it across the water to sink it.
- Use the cleric robe to get onto the submerged stone. Then move down, right to the landmass with the puzzle.
Bottom-Left Puzzle Solution
- Move the wizard all the way down. Then press left to swap with the sailor. Press left again to swap with the monster.
- Move the wizard up x3. Then press right to swap with the stone. Press down to swap with the monster.
- Move the wizard left, up, right. Then press up to swap with the monster. The monster is now in the top row of the bottom landmass.
- Move the cleric up. Control the wizard and press right to swap with the cleric.
- Move the cleric up. Control the wizard and press left to swap with the stone.
- Move the cleric down. Move the wizard down.
- Use the sailor to push the stone down into the row with the wizard. Then push it left across the water.
- When the stone is below the cleric, use the wizard to swap with it. Press right again to swap with the sailor.
- Use the sailor to push the cleric up to the platform with two teleporters.
- Use the wizard to swap with the monster and reach the platform with the single teleporter.
How to Reach the Bottom-Right Puzzles
Solving the previous puzzle unlocks another skipping stone. Use it to reach the bottom-right puzzles:
- Backtrack to the left landmass and use the reset tile to reset the stones. Equip the sailor robe.
- Push the top stone up x2. Then push it right across the water, sinking it to the left of the upward-facing monster.
- Push the middle stone up x2. Then push it right across the water. It will land on the bottom square of the right landmass.
- Push the bottom stone up to the row with the middle stone. Then push it right across the water, sinking it to the left of the middle stone.
- Use the cleric robe to reach the top-right landmass, and then follow the new path down to the bottom-right puzzles.
Bottom-Right Puzzle #1 Solution
- Use the warrior to push the monster up.
- Move the cleric right, down. Then move her all the way right across the monster’s fire.
- Move the warrior left. Then push up x2 to get above the monster. Push the monster down into the row with the stone.
- Move the cleric to the right of the stone. Move the warrior to the right of the cleric. Push left x7.
- Move the warrior below the stone. Push the stone up, all the way left.
- Move the cleric under the stone. Move the warrior to the right of the cleric. Push left, then up, sending the stone to the top-left platform.
- Move the cleric all the way right, blocking the monster’s fire.
- Use the warrior to push the monster up to the row below the stone.
- Move the cleric to the left of the monster. Then move left.
- Move the warrior between the cleric and the monster. Push left until the warrior is below the stone. Then push the stone up x4, all the way left.
- Move the cleric left into the column with the stone. Use the warrior to push the stone down into the cleric, sinking it.
- Move the cleric right x5. Move the warrior to the right of the cleric, and push all the way left.
- Move the warrior up onto the submerged stone to access the teleporters.
Bottom-Right Puzzle #2 Solution
- Use the sailor to push the stone down, all the way left, left across the water. Move the sailor to the right side of the rock formation on her platform.
- Use the warrior to push the stone into the column to the right of the monster. Then push it up across the gap.
- Use the warrior to push the monster right x3, down x6. Then push the stone below the monster.
- Move the cleric all the way left, all the way down, right. Move the sailor to the left of the cleric, and push right.
- Use the warrior to push the stone right across the water. Immediately push the monster down.
- Move the cleric down. When the stone is below the sailor, use the sailor to push it down and send the lily pad to the left. Move the sailor up.
- Use the warrior to push the monster down. Then push the monster onto the lily pad as it passes.
- Move the cleric into the row with the monster. Then move her left until she is down, right from the warrior. The warrior can now move to a teleporter.
Solving this puzzle removes a barrier at the bottom of the screen. Use the downward-facing monster’s fire to continue downward into Heroes and Water North.

- Released
-
October 8, 2026
- ESRB
-
Everyone / Mild Fantasy Violence
- Developer(s)
-
Thekla Inc.
- Publisher(s)
-
Arc Games
