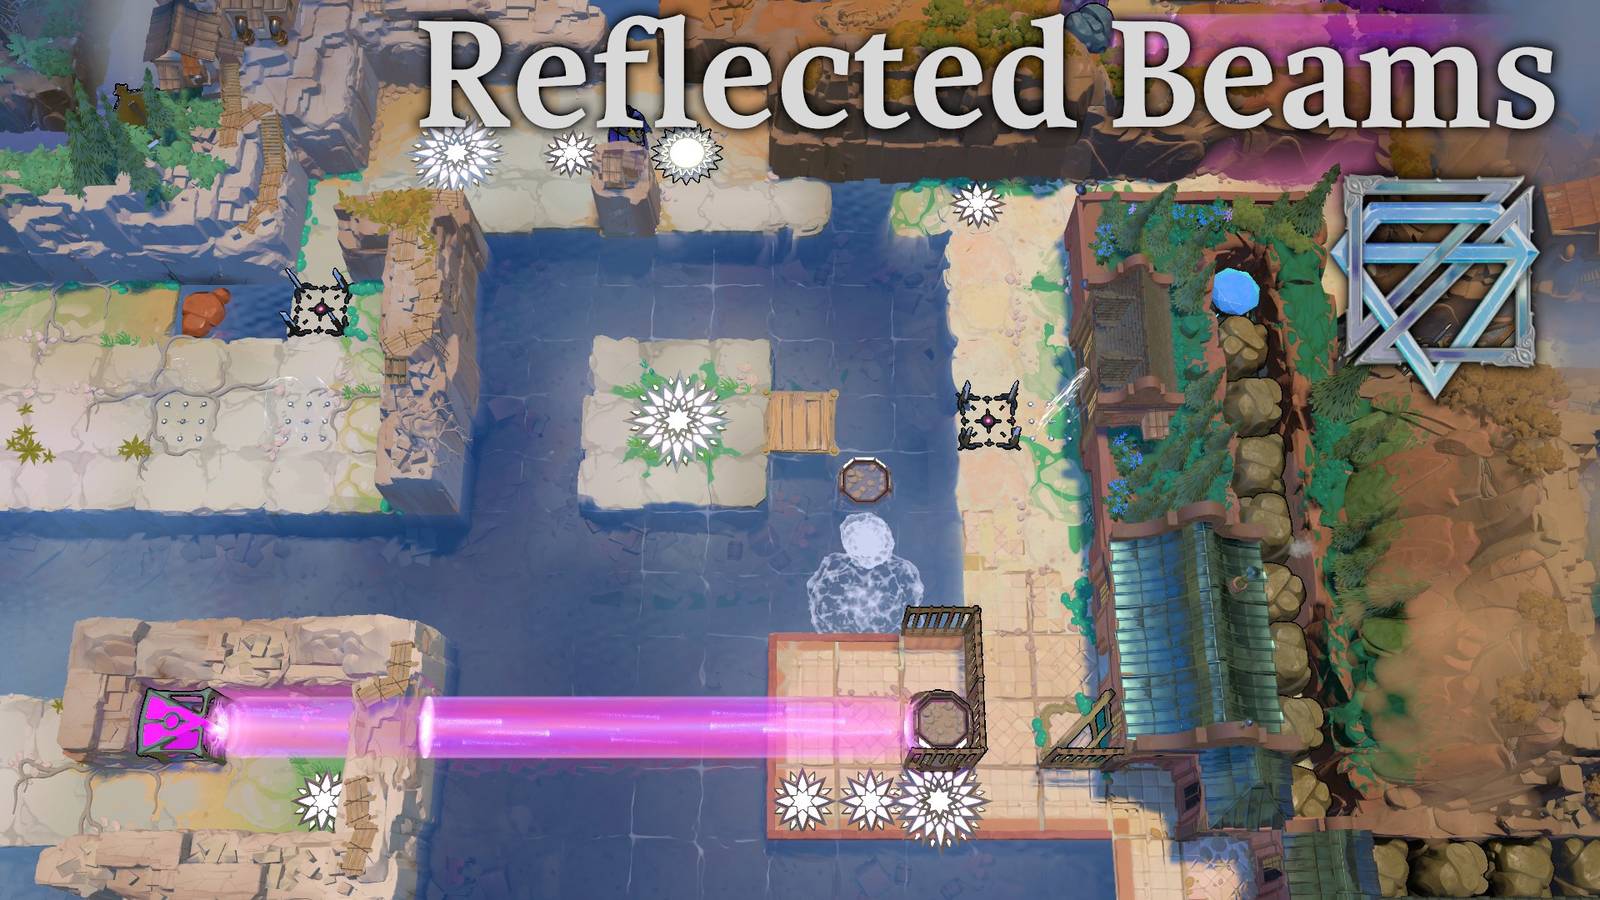
Reflected Beams and Beams Reflected are far west areas in Order of the Sinking Star. They are accessed by opening the MxB gold room, which can be reached after making significant progress in Vault of the Beamcaster and The Mirror Isles. This walkthrough will help you solve all the puzzles found in Order of the Sinking Star‘s Reflected Beams and Beams Reflected areas.
Instructions that give an unmodified direction (e.g. “move left”) mean move one square in that direction. If the direction has a modifier (e.g. “x3”), move that many squares in the indicated direction. If the term “all the way” is used, travel in that direction until you run into a barrier or reach the end of a path.
MxB Gold Room

Puzzle Solution
- Move the orange NPC all the way up and send him through the top mirror.
- Move the orange NPC down, all the way left, all the way down. Send him through the bottom mirror.
- Push the bottom mirror down, and move left to get out of the way.
- Move the miner up, then send him through the bottom mirror. Move him left to get him out of the way.
- Use orange to push the bottom mirror up. Move orange above the mirror with one space between and send him through.
- Move orange right, all the way up, right, up. Send him through the top mirror.
- Move orange all the way right, and send him through the top mirror. Push the top mirror all the way right, then move down to get out of the way.
- Move the miner to the top-left corner of his landmass, and send him through the top mirror.
- Move the miner to the bottom-left gem and collect it to deactivate the lasers. Then move him to the remaining gem and collect it.
- Put a gem back into the holder to start the lasers. Send orange down through the pink beam. Then use him to push the orange laser all the way right.
- Use the orange beam to teleport orange into the alcove with the teleporter. Send the miner through the pink beam to reach the top-left teleporter.
Stand to the right of the gold mirror and trigger it to get below. Push the mirror up, all the way left. Then move all the way right and trigger the mirror to reach the first screen of Reflected Beams.
Reflected Beams Screen #1 (Top)

Top Puzzle #1 Solution
- Move up one screen and push the mirror right.
- Return to the previous screen, and move to the top-right corner. Trigger the mirror to reach the checkpoint.
- Move right one screen. Move up one screen and trigger the mirrors to move a crystal.
- Move down one screen, left one screen.
- Move to the outlet in the top-left corner and trigger the mirrors to move the crystal.
- Move down one screen, and push the crystal up x2.
- Return to the top-left outlet and trigger the mirrors. This will put the crystal into a gap, allowing you to reach the landmass that is one screen right, one screen up.
- Move to the outlet at the top of the platform and trigger the mirrors to reach the next checkpoint.
- Move the left crystal right.
- Move to the outlet in the bottom-left corner of the screen. Trigger the mirrors to send the crystal to the left.
- Move one screen left, one screen down. Push the crystal down, right x2. Then push it right into the water.
- Move up one screen, right one screen. Push the crystal left.
- Return to the crystal you pushed into the water and stand on it. Trigger the mirrors to send the second crystal through.
- Push the crystal all the way up, left. Then push it left into the water to create a path to the teleporter.
Top Puzzle #2 Solution
- Trigger the mirror to teleport through it. Move all the way down, right. Trigger the mirror to send the crystal through.
- Move to the left side of the mirror. Trigger it to teleport through, and collect the first gem. Then teleport back through the mirror.
- Move all the way down, right. Trigger the mirror to send the crystal back through. Put the gem on the holder to activate the red laser, and use it to deactivate the red barrier.
- Re-collect the gem, and stand on the deactivated red barrier.
- Move all the way right and grab the map that is above you. Use it to get an ariel view of the level.
- Move to the room with the 3×2 grid of holders and the teal laser.
- Trigger the mirror to send the crystal into the middle.
- Stand above the left mirror, and trigger the mirrors again. This will put the crystal in the bottom-right corner of the room.
- Put the gem in the holder to the left of the crystal. Move up x2 and trigger the mirrors to reach the gem at the top of the room.
- Teleport back through the mirror after you collect the gem, and re-collect the other gem.
- Move through the opening on the right side of the room. Follow the path down to reach a holder to the left of a green laser. Put a gem in that holder.
- Return to the holder that activates the red laser, and put a gem into it.
- Move to the right side of the green laser. Go all the way right and trigger the mirror to move a purple crystal. You’ll visit that area later.
- Go left x4, down. Trigger the mirror to reach another gem, and use the red laser to deactivate the barrier to its right.
- Re-collect the gem that is powering the red laser.
- Go to the room with the two holders and the orange laser. Insert gems into those holders to power the orange laser.
- Move into the bottom-left square of the orange laser. Trigger the mirror to teleport through it. Then press left to warp to the right side of the mirror.
- Press down to warp out of the laser, and move left to re-enter it.
- Trigger the mirror to teleport through it, press right to warp to the left side of the orange laser, and go down to another gem.
- Enter the orange laser and press left, down to exit the area. Re-collect the two gems.
- Go one screen right, one screen up. You’re now in the area where you moved the purple crystal while standing in the green laser.
- Stand in the square down, left from the mirror, and trigger the mirror to send the purple crystal through. This will give you access to another gem. Collect it, return to the square down, left from the mirror, and send the purple crystal through to exit the area.
- Go to the gem powering the green laser. Trigger the mirrors so that the purple crystal to your right is in the left position.
- Go to the red laser and enter the alcove that is up, right x2 from the laser. Trigger the mirror to move the crystal to the position above the red laser.
- Move left out of the alcove and trigger the mirror to send that crystal from Step 23 right. Then move back into the alcove and trigger the mirror to send the crystal up.
- Move to the square up, right from the crystal. Trigger the mirror to send it up.
- Move all the way up, left x2. Trigger the mirror to put the crystal next to a gem.
- Move right x2. Trigger the mirror to send the crystal into the water. Stand on the submerged crystal, and trigger the mirror to reach the next gem.
- Return to the gem powering the green laser. Collect it.
- Go all the way down. Trigger the mirror to get sent to another gem. Collect it and trigger the mirror to leave the area.
- Put the seven gems into the holders in the room with the teal laser.
- Follow the laser to the first mirror it hits. Push the mirror right.
- Go to the next mirror the laser hits, and push it down x2.
- Go the next mirror the laser hits, and push it left x2.
- Go to the next mirror the laser hits, and push it right into the water.
- Go to the next mirror the laser hits, and push it down.
- Move to the left of the red laser, and push the mirror below you down.
- Return to the previous mirror, and push it down.
- Go to the final mirror that the teal laser is hitting and push it up.
- Go to the mirror above the teleporter, and push it right.
- Enter the enclosure with the teleporter, and push the stone left.
Reflected Beams Screen #2

Start by pushing the moving device right into the water. Then push the rock into the top-left corner of the landmass, and push it left into the water. Push the mirror onto the moving device when it arrives, stand on the submerged rock, and teleport through the mirror to reach the middle puzzles.
Middle Puzzle #1 Solution
- Push the mirror up.
- Push the moving device to the left side of the mirror.
- Quickly use the mirror to get to the top strip of land.
- Follow the mirror as the device pushes it to the right, and teleport when it will allow you to reach the teleporter.
Middle Puzzle #2 Solution
- Push the right mirror to the right. Stand below it. When the moving device is above the crystal, blocking it, trigger the mirror to get on its right side.
- Push the mirror all the way left, and move all the way right. When the moving device is above the crystal, trigger the mirror to reach the middle landmass.
- Push the crystal down. Push the mirror into the top-left corner.
- Push the moving device into the bottom-right corner. Move to the bottom-left corner and trigger the mirror. Allow the device to push the crystal under the mirror, and trigger it again. You are now on the left landmass with the crystal.
- Push the crystal up into the water to create a path to the teleporter.
Reset the rock and mirror. Put the mirror back on the moving device in the water. Push the rock left x2, up, then up into the water gap. Stand on the submerged rock and teleport through the mirror when it is all the way left to reach screen #3.
Reflected Beams Screen #3

Middle Puzzle #1 Solution
- Collect the power-up.
- Push the left rock down, left x3, then left into the water.
- Push the remaining rock left x2, down x2, left, down. It is now in the bottom-left corner of the landmass.
- Push the mirror up x2, left x3, down x2.
- Move onto the submerged rock, and move down. Trigger the mirror when you are facing downward, then push the bottom rock left to create a path to the teleporter.
Middle Puzzle #2 Solution
- Collect the power-up.
- Push the bottom rock right x2, down, then down into the water. Push the remaining rock on top of the submerged rock.
- Move between the mirrors and trigger them to create a clone.
- Move all the way down, right x2, down, right x3, all the way down, right. The clones are now next to each other in the same row.
- Push the stone right. There is now a space between the clones and between the submerged rocks.
- Move up, all the way right. Move the clones to the teleporters.
Right Puzzle Solution
- Collect the power-up.
- Push the laser right x2.
- Push the middle mirror right x7, up x4.
- Push the top-right mirror left, all the way down, right.
- Push the left mirror down, right x2.
- Move through the green beam to reach the middle enclosure.
- Face right in the beam and turn the laser right.
- Move left until you are in the column with the left mirror. Rotate the laser left to create a path to the teleporter.
Push the rock on the left side of the screen up, and follow the path right to reach the bottom of screen #1.
Reflected Beams Screen #1 (Bottom)
Bottom-Left Puzzle Solution
- Push the mirror left, all the way down, left.
- Move above the mirror with two spaces between. Trigger the mirror to reach the left landmass.
- Push the mirror up x5, all the way right, down. Get below the mirror so that it will send you back to the right landmass.
- Stand above the mirror and trigger it to get on its left side. Then push it all the way up.
- Move above the mirror, all the way to the top. Trigger the mirror chain to reach the left landmass.
- Get below the mirror so that it will send you to the left side of the mirror on the right landmass. Trigger it.
- Push the mirror right, down x2. Get above the mirror, all the way to the top, and trigger it to go to the left landmass.
- Push the mirror down. Go below the mirror, all the way down and trigger it to return to the right landmass.
- Push the mirror up. Go above the mirror so it will send you to the right of the left mirror. Trigger it.
- Push the mirror to the top-right corner of the landmass. Use it to travel to the right landmass.
- Push the mirror onto the lowest square. Then use it to teleport to the square in the bottom-right corner of the left landmass.
- Trigger the mirror to reach the teleporter.
Move into the square above the puzzle. When the moving device blocks the purple beam, press right to reach the bottom-right puzzles.
Bottom-Right Puzzle #1 Solution
- Push the left plain mirror down, right into the red beam.
- Push the other plain mirror down, right, sending the red beam through the column to the left of the right barrier.
- Push the ornate mirror the square down, left from the left mirror.
- Use it to reach the bottom dock, deactivate the red barrier, and push the rock up x6, left x8, down, left x2. Then push it left into the water.
- Push the left plain mirror up to get it out of the way.
- Push the ornate mirror left x4, up, sending the red beam through the column to the right of the left barrier.
- Use the mirror to teleport to the bottom-left dock, deactivate the barrier, and push the rock up and across the submerged rock to create a path to the teleporter.
Bottom-Right Puzzle #2 Solution
- Push the gem onto the holder to activate the red laser.
- Push the red laser left, and use its beam to deactivate the barrier at the bottom of the top-right room.
- Push the mirror in the bottom-right room up, left x2, down. Use the reflected beam to deactivate the barrier to the left. Push the mirror in the bottom-right room up.
- Go into the bottom-middle room, and push the mirror up x2, left. Deactivate the barrier at the top.
- Push all three available mirrors into the top-right room. The idea is to bounce the beam right, then up, then left into the row with the top barrier, which you can then deactivate.
- Push the laser left. Push the up-left mirror into the bottom-right room. You need to send the beam into the mirror in the bottom-left room.
- Move the mirror in the top-left room into the column with the reflected beam, all the way down. The beam now passes above the final barrier, allowing you to deactivate it and reach the teleporter.
Bottom-Right Puzzle #3 Solution
- Push the mirror into the red beam. Then push it left x4. The beam is now hitting a barrier you can deactivate.
- Push the mirror through the deactivated barrier, into the column with the barrier in this enclosure, and up into the red beam. You can now deactivate the barrier in the enclosure.
- Push both mirrors out of the enclosure. The left-up mirror should go to the right of the red laser, sending the beam up. Put the down-left mirror into the row with the barrier blocking the other enclosure, and in the reflected beam. Deactivate the barrier.
- Move the down-left mirror into the alcove above the barrier you just deactivated, and into the row with the laser. Move the up-left mirror into the alcove above the first alcove, and reflect the beam onto the barrier to the left. Deactivate it.
- Push the mirror out of the second enclosure and into the corridor that leads to the teleporter. Move the down-left mirror to the right of that mirror, and use the up-left mirror to send the red beam into it. This will create a chain that lets you deactivate the barrier blocking the teleporter.
Top-Right Puzzle Solution
- Push the pink crystal down into the pink beam.
- Push the moving device down to the left side of the pink crystal. The crystal will teleport right when the device pushes it right.
- Push the crystal into the gap in the top-right corner to create a path to the top landmass.
- Push the gem off the holder to deactivate the laser. Then push the laser up onto the top landmass, all the way left, and down into the water that is down, right from the teleporter.
- Push the orange crystal up into the water. Push the moving device up into the water when it is to the left of the crystal. This will submerge the crystal in the water to the left of the laser.
- You can now walk across the laser and submerged crystal to reach the teleporter.
Solving this puzzle unlocks a moving device and mirror on the screen. Push the device left into the water, and make your way back to the top of screen #1. You can now ride the device to reach the middle puzzle.
Middle Puzzle Solution
- Move up into the pink beam. When the moving device enters the beam, press left to teleport to the left landmass.
- Push the crystal into the top-right corner. Push the mirror below the crystal. Push the moving device all the way right into the water.
- When the moving device is above the crystal and traveling upward, push the mirror and crystal right into the water.
- Enter the pink beam and press right to return to the right landmass.
- Push the gem off the holder to deactivate the laser.
- Push the up-right mirror so that it is down, left from the rock. Push it right into the water.
- Push the down-left mirror into the column with the bottom submerged mirror. Then push it up into the water.
- Push the laser to the right of the teleporter. Then push it down into the water.
- Return the gem to its holder to activate the laser.
- The moving device will send the crystal through the laser, creating a path to the teleporter.
Push the mirror on the right side of the screen down into the pink beam. When the beam is reflected by the mirror, teleport through it to reach Beams Reflected.
Beams Reflected Screen #1

Start by pushing the mirror all the way left. Use the orange beam to reach the bottom-right puzzle.
Bottom-Right Puzzle Solution
- Push the laser right. Push the left mirror right. Then push the laser left x2.
- Push the left mirror all the way right
- Push the top mirror down x2.
- Push the remaining mirror up x3, all the way right.
- Push the laser right x4.
- Move the miner to the square down, left from the orange NPC. Push right twice to teleport to the right teleporter.
- Push the laser all the way left.
- Push the bottom-left mirror down, left x4, up, left.
- Press down to teleport to the bottom of the screen. Move right, up x2 to re-enter the beam. Press up, left x2 to teleport to the left teleporter.
Reset the mirror and push it right x2. Standing in the orange laser with one space between you and the mirror and pressing right will push the mirror right. Use the reflected beam to teleport down to the open square. Then teleport right to the puzzle.
Bottom-Middle Puzzle Solution
- Move the left mirror up.
- Move the middle mirror right x4, up.
- Stand in the square left of the top-right mirror, and press left. Then press right to teleport to the teleporter.
Push the mirror up into the water. Then use the orange beam to reach the top-right puzzles.
Top-Right Puzzle #1 Solution
- Use the right character to push the top mirror right x2. Then push the bottom mirror left.
- Use the left character to push the laser up x2. Send the right character up through the laser to get above the top mirror.
- Push the laser down x2 to get it out of the way.
- Use the right character to push the top mirror down x2. Then push the bottom mirror down, right.
- Use the left character to push the laser up x3. Then push the left mirror down, right x3.
- Send the right character left through the pink beam to reach the teleporters.
Top-Right Puzzle #2 Solution
- Use the orange NPC to push the bottom mirror left x2, up.
- Use the miner to push the left mirror up.
- Use the orange NPC to push the bottom mirror up x2.
- Use the miner to push the right mirror down x2.
- Use orange to push the bottom mirror down x2.
- Use the miner to push the right mirror down x2.
- Use orange to push the bottom mirror up x2.
- Use the miner to push the left mirror down.
- Use orange to push the bottom mirror down x2.
- Use the miner to push the left mirror all the way right, up.
- Use orange to push the bottom mirror down x2. Then use orange to push the top mirror down x3, left x3. Move him up to get him out of the way.
- Send the miner down through the pink beam to reach the teleporters.
Top-Left Puzzle #1 Solution
- Move right and trigger the mirror. There are now four orange characters.
- The goal is now to move the up-right-facing mirror down x2, left x2, the up-left-facing mirror directly right of the up-right-facing mirror, and the down-left-facing mirror in the square down, right from the laser. I recommend using the terrain to get three of the clones stuck in the top-right area while you move the mirrors.
- Use the terrain to get all the clones into the same column. The top two clones should be next to each other, then a space, then the third clone, then a space, then the fourth clone.
- Get into the column with the down-left-facing mirror, push it up into the pink beam, and press down to reach the teleporter.
Top-Left Puzzle #2 Solution
- Move left x2 and trigger the mirror. There are now two orange characters.
- Push the mirror down x3, left.
- Use the terrain to get the clones into the same row with one space between.
- Move into the top horizontal beam, with a space between the left clone and the vertical beam.
- Press left. The left clone is at the intersection of the horizontal and vertical beams.
- Press right to eliminate a clone, allowing you to access the teleporter.
Now return to the bottom of Reflected Beams screen #1, and follow the path in the bottom-right corner to reach screen #4.
Reflected Beams Screen #4

Push the mirror up, all the way left. Then use the mirror to reach the first puzzle.
Middle Puzzle #1 Solution
- Push the mirror left x2. Destroy the rock up, right from the mirror. Move all the way right and press up to destroy the right rock.
- Push the remaining rock in the row left x4.
- Push the mirror up. Destroy the two right-most rocks.
- Push the middle rock on the right side up into the water.
- Push the mirror right x2, down, left.
- Push the rock from Step 2 right x4 and up across the submerged rock to make a path to the top-right platform.
- Push the bottom mirror left. Push the top mirror into the row with the bottom mirror. Move up x2, and destroy the rock on your left. Push the rock below the rock you just destroyed down, right, all the way up, all the way left, and left into the water.
- Push the up-left mirror below the laser. Destroy the rock to the left of the laser.
- Push the laser and the up-left mirror right. Push the up-right mirror to the left of the up-left mirror with one space between. Break the rock being targeted by the beam.
- Push the rock to the right right x2, all the way up, all the way left, and left into the water to extend your bridge toward the teleporter.
- Move the left mirror down. Destroy the left-most rock, and push the rock to your right across the bridge you are creating to extend it.
- Move the left mirror all the way left, up and destroy the rock in the top-left corner. Push the rock to the right across your bridge.
- Push the laser across the bridge and into the water to finish the path to the teleporter.
Solving this puzzle unlocks a rock. Push it to the bottom-left corner of the dock, then push it down into the water. Push the mirror into the top-left corner of the dock, stand on the submerged rock, and teleport to the next puzzle.
Middle Puzzle #2 Solution
- Push the right mirror down x2, left.
- Push the gem onto the holder.
- Stand to the left of the right mirror and teleport through the laser.
- Push the laser into the column with the right mirror. Teleport down through it.
- Push the gem off the holder. Push the mirror left. Push the gem back onto the holder.
- Teleport up through the laser.
- Push the laser into the column with the left mirror. Teleport through it.
- Push the left mirror all the way up. Teleport through the laser.
- Push the laser into the column with the right mirror. Teleport through it.
- Push the right mirror all the way up. Teleport through the laser.
- Push the laser into the column with the left mirror. Teleport through it to reach the teleporter.
Solving this puzzle unlocks the third middle puzzle. Reach it by resetting the rock and pushing it into the water above the warp. Put the mirror on the submerged rock, move all the way down, and trigger the mirror.
Middle Puzzle #3 Solution
- Enter the green beam and move down until you are left of the mirror. Push it right.
- Push the mirror down, left x2. Follow the green beam until you are below the right mirror, and push it up.
- Push the left mirror right. Then move down, right. Push the mirror up into its original position.
- Use the green beam to get on the left side of the left mirror. Push it right.
- Push the mirror up x2, left x2. Follow the green beam all the way right, then move down to get on the right side of the right mirror.
- Push the right mirror left. Push the left mirror left. Push the right mirror to the right side of the left mirror.
- Use the green beam to get on the left side of the laser. Push it right.
- Push the left mirror down. Push the right mirror right. Push the left mirror up, right.
- Use the beam to get on the left side of the teleporter. Move right onto the teleporter.
Use the reset tile. Push the rock to the bottom-right corner of the dock, and push it right into the water. Push the mirror onto the submerged rock, move all the way left, and use the mirror to reach the next screen.
Reflected Beams Screen #5

Top-Right Puzzle Solution
- Push the pink laser down.
- Push the top mirror left x5, down x2. Push the other mirror down. The bottom miner can now exit the block he is trapped in.
- Push the bottom mirror up x4, down, left x4, down. The top miner can now teleport through the pink beam to exit his cell.
- Push the green laser right x2, all the way up.
- Push the bottom mirror right x8, all the way up, left x2, up. Push the other mirror all the way right so that it is left of the pink laser. You can now send all three characters through the laser to the teleporters.
Push the gem in the top-right corner right onto the holder to activate the blue beam. Push the rocks to the left all the way left, then push the right-most rock up x2 to start a path to the puzzle. Push the left rock down out of the way, and push the remaining rock right, all the way up to complete the path.
Top-Left Puzzle Solution
- Collect the top-right gem and put it on the top-right holder to activate the laser.
- Push the top-right mirror up.
- Push the top-left mirror left. Then push the bottom-left mirror left.
- Push the top-left mirror left x2. Then push the bottom-left mirror down x2.
- Push the bottom-right mirror right, down x2.
- Push the bottom-left mirror down x2. Then push the bottom-right mirror down.
- Push the bottom-left mirror down. Then push the bottom-right mirror right x3.
- Push the top-right mirror left.
- Push the bottom-right mirror right. Then push the laser up.
- Push the top-right mirror left into the column with the crystal, and push the crystal down to access the teleporter.
How to Reach the Middle Puzzle
Solving the previous puzzle unlocks a mirror. Use it to reach the middle puzzle:
- Reset the screen.
- Use the blue beam to push the three rocks left again.
- Push the left and middle rocks down into the water. Push the remaining rock left x2, down x2, putting it in the water below the left rock.
- Push the mirror into the beam, all the way to the left.
- Enter the alcove with the white robe, and stand in the beam facing upward. Use your power to rotate the laser upward.
- Push the laser and the rocks all the way down to access the puzzle.
Middle Puzzle Solution
- Collect the power-up.
- Rotate the laser down, then push all the way up.
- Rotate the laser right, then push all the way left.
- Rotate the laser down, then push up.
- Rotate the laser right, then push all the way left.
- Rotate the laser up, then push all the way down.
- Rotate the laser right, then push all the way left.
- Rotate the laser down, then push up to the checkpoint.
- Push the laser up to the row below the mirror. Rotate it right, then push the mirror up.
- Rotate the laser left, then push it to the column two to the right of the mirror.
- Rotate the laser down, then push it up to the right side of the mirror with one space between.
- Push the mirror left x4.
- Rotate the laser up, then push it down x2.
- Rotate the laser right, then push it into the column with the mirror.
- Rotate the laser up. Then push the mirror all the way up, all the way right.
- Rotate the laser down, then push it all the way up.
- Rotate the laser right, then push it left.
- Stand in the reflected beam facing down, and rotate the laser down.
- Push it up to create a path to the teleporter.
How to Reach the Bottom-Right Puzzle
Solving the previous puzzles unlocks another mirror. Use it to reach the bottom-right puzzle:
- Push the mirror down x2, left x3, all the way right.
- Enter the white robe alcove and stand in the beam facing left. Use your power to rotate the laser left.
- Push the laser and rocks all the way right.
Bottom-Right Puzzle Solution
- Use the miner to push the mirror left x7. Then move him to the bottom of the reflected beam and push the right rock right. Move him up out of the way.
- Use the orange NPC to push the right rock right x2, allowing him to leave his enclosure.
- Use the orange NPC to push the mirror right x4. Then move him down to the left side of the three-rock row.
- Use the miner to push the mirror left. Then use orange to push the rock row right.
- Use the orange NPC to push the mirror right. Then push the rock row right again to clear the path to the checkpoint.
- Use the orange NPC to push the left mirror right.
- Move the miner to the green beam, and use it to enter the alcove with the blue laser.
- Use the orange NPC to push the middle mirror down, all the way left. Then push the right mirror down, left x3.
- Use the miner to push the rock up.
- Use the orange NPC to push the right mirror right x2. Then use the miner to push the laser up.
- Use the orange NPC to push the top-left mirror up. Then push the bottom-right mirror left x2.
- Use the miner to push the rock column up. Then push the laser right.
- Use the orange NPC to push the bottom-right mirror right x3. Then use the miner to push the laser up.
- Use the orange NPC to push the top-left mirror up. Then push the bottom-right mirror left x3.
- Use the miner to push the rock column up. Then use the orange NPC to push the rock column up again, clearing the path to the teleporters.

- Released
-
October 8, 2026
- ESRB
-
Everyone / Mild Fantasy Violence
- Developer(s)
-
Thekla Inc.
- Publisher(s)
-
Arc Games
